Trigger AWS Eventbridge with Lambda written in Rust!
In this guide, I will show you how to set up a Rust Lambda function triggering an EventBridge event, which is then processed by another Rust Lambda function displaying event details. Essentially this is the same tutorial as last week, but this time we are using Rust as programming language
For this tutorial you need to have the aws cli and Rust installed on your machine. Also I recommend to use the cross-rs cross compiler https://github.com/cross-rs/cross
First we go at the location where we want to create our folder and use cargo for creation of our rust directory.
cargo new sender-rust-lambda

cd sender-rust-lambda
The following snippet is our Rust code for the Lambda Request Handler. You should put this in the created file main.rs
use crate::eventbridge::types::PutEventsRequestEntry;
use aws_sdk_eventbridge as eventbridge;
use lambda_runtime::{service_fn, LambdaEvent, Error};
use serde_json::{json, Value};

async fn handler(_event: LambdaEvent<Value>) -> Result<Value,Error> {
    let event = r#"
    {
        "message":"Hello via EventBridge!"
    }"#;

    let config = aws_config::load_from_env().await;

    let client = aws_sdk_eventbridge::Client::new(&config);

    let input = PutEventsRequestEntry::builder()
        .detail(event.to_string())
        .detail_type(String::from("myEvent"))
        .event_bus_name(String::from("our-cool-event-bus"))
        .source(String::from("myEventBridgeSource"))
        .build();

    match client.put_events().entries(input).send().await {
        Ok(_result) =>  Ok(json!({ "message": format!("Hello!") })),
        Err(_err) => match _err.into_service_error() {
            eventbridge::operation::put_events::PutEventsError::InternalException(e) => {
                 println!("reason: {:?}", &e.message().unwrap());
                 return Ok(json!({ "Event Error": format!("Hello!") }))
            },
            _ => {
                    println!("else");
                    todo!()
                }
        },
        Err(_) => todo!(),
    }
}

#[::tokio::main]
async fn main() -> Result<(), Error> {
   lambda_runtime::run(service_fn(handler)).await
}
Additionally we have to declare our dependencies in our cargo.toml file
[package]
name = "sender-rust-lambda"
version = "0.1.0"
edition = "2021"

# See more keys and their definitions at https://doc.rust-lang.org/cargo/reference/manifest.html

[dependencies]
aws-config = { version= "1.0.3", features = ["behavior-version-latest"] }
tokio = { version = "1", features = ["full"] }
aws-sdk-eventbridge = "1.4.0"
lambda_runtime = "0.8.3"
aws-sdk-cloudwatchevents = "1.4.0"
serde_json = "1.0"
In your command line tool write the following if you use the cross compiler mentioned above
cargo install cross --git https://github.com/cross-rs/cross

cross build --target x86_64-unknown-linux-gnu --release
You will find a target\x86_64-unknown-linux-gnu\release folder in which you find the binary with the name sender-rust-lambda. Rename this file to bootstrap and then zip it to bootstrap.zip.
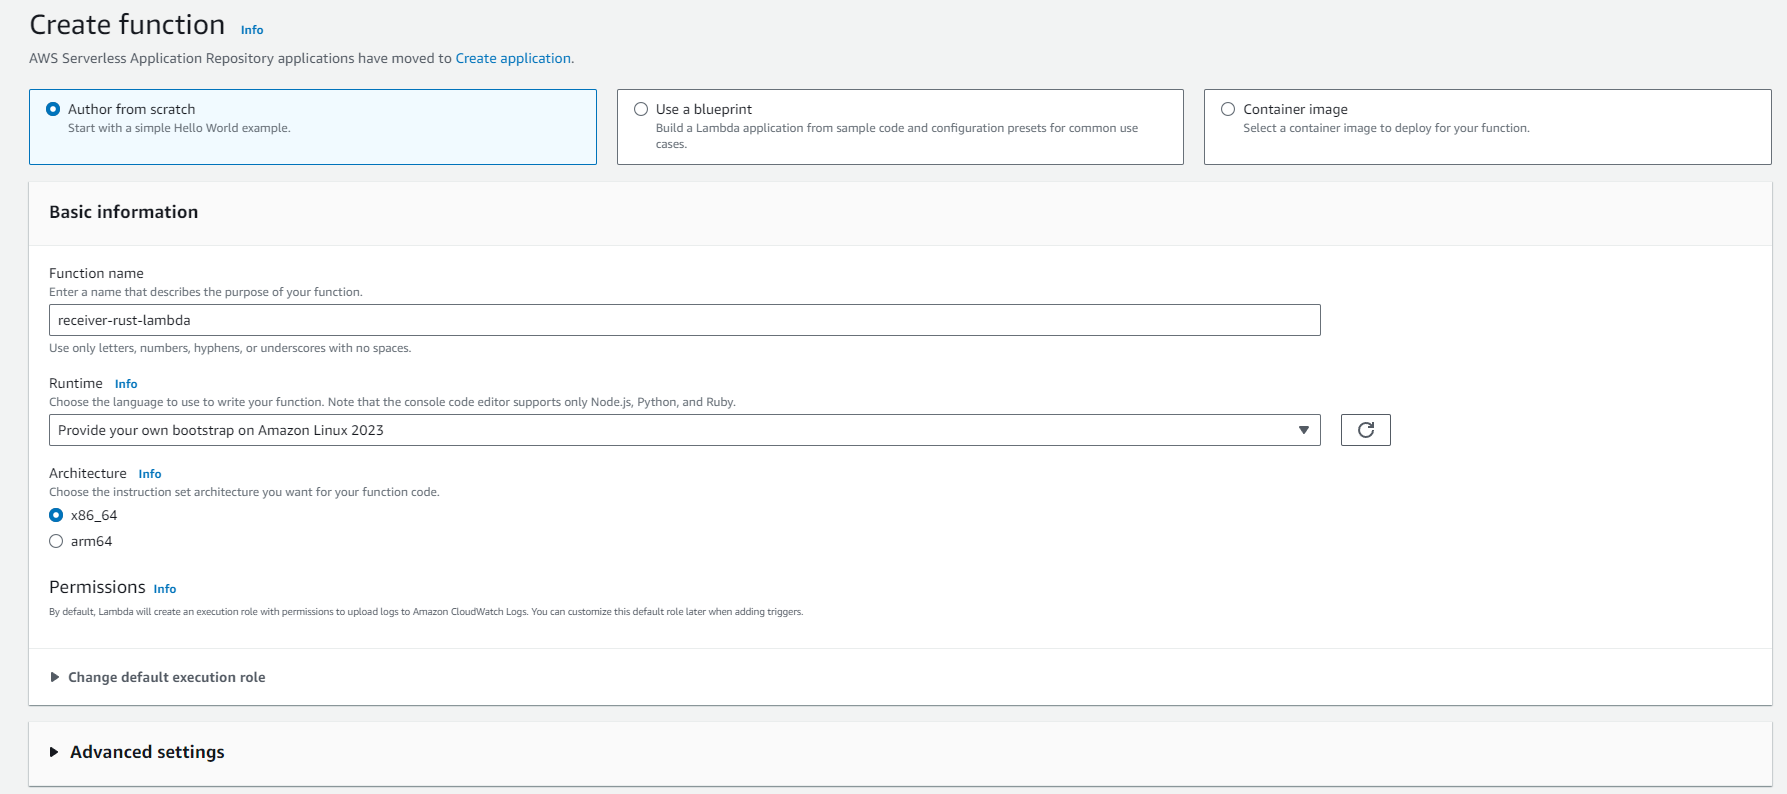
Now you have to create your lambda in the AWS management console or via CLI
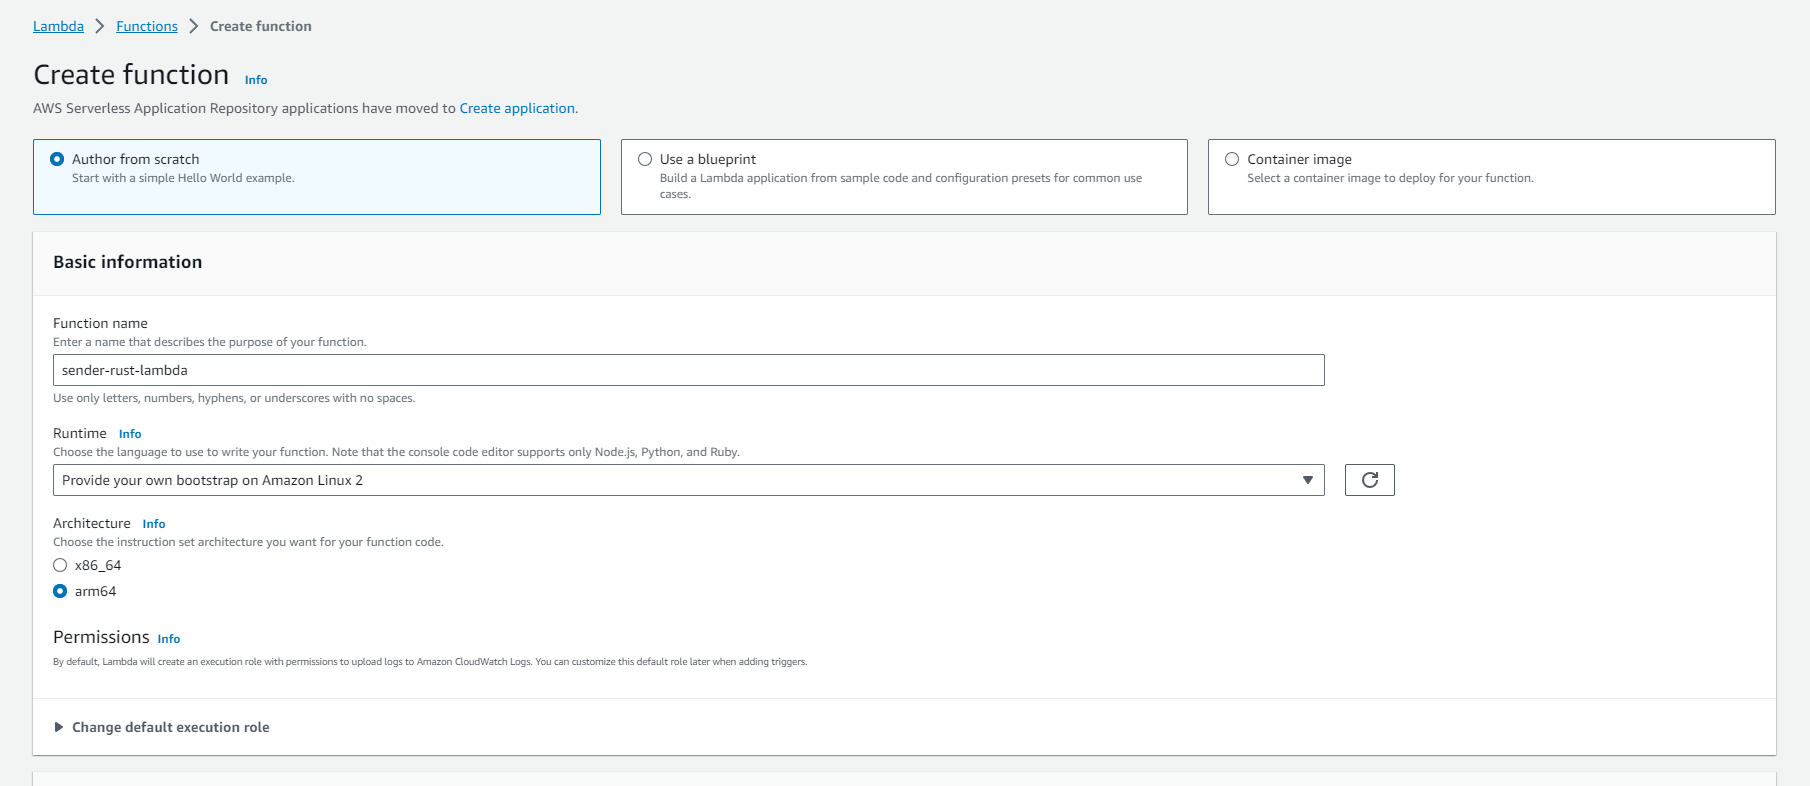
Next we have to upload our zip file to our lambda function. You can do this either with the AWS cli or go to the AWS managment console and click on the Code Tab in the Lambda. On the right side you can upload the zip.
aws lambda update-function-code --function-name sender-rust-lambda --zip-file fileb://./bootstrap.zipThe lambda function has to be configured that it takes the correct entrypoint.
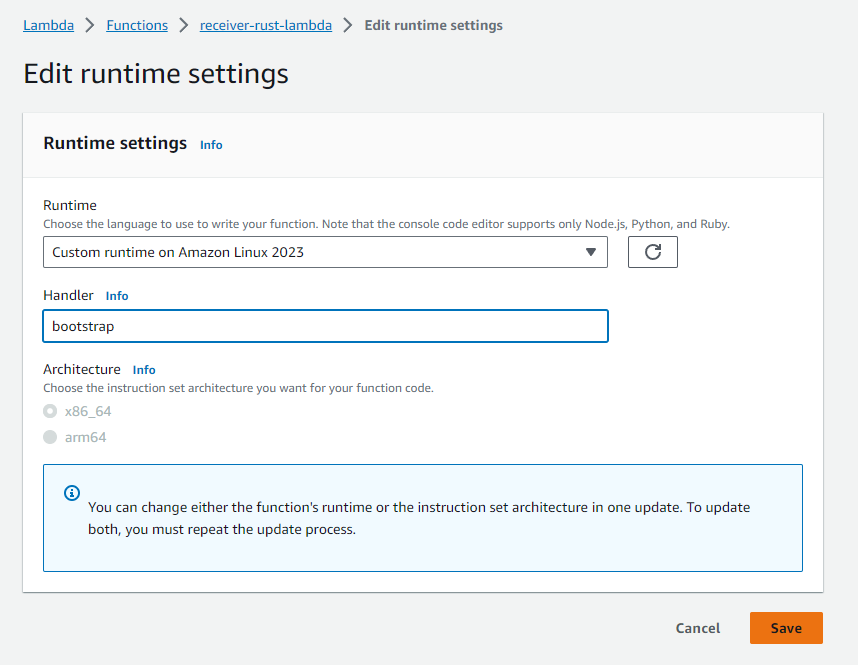
This can be done on the Lambda Management in the Code tab when you scroll down to Runtime Settings and click on Edit
Here you have to add bootstrap (the name of our binary) as Handler and then edit a second time and choose x86 as architecture.

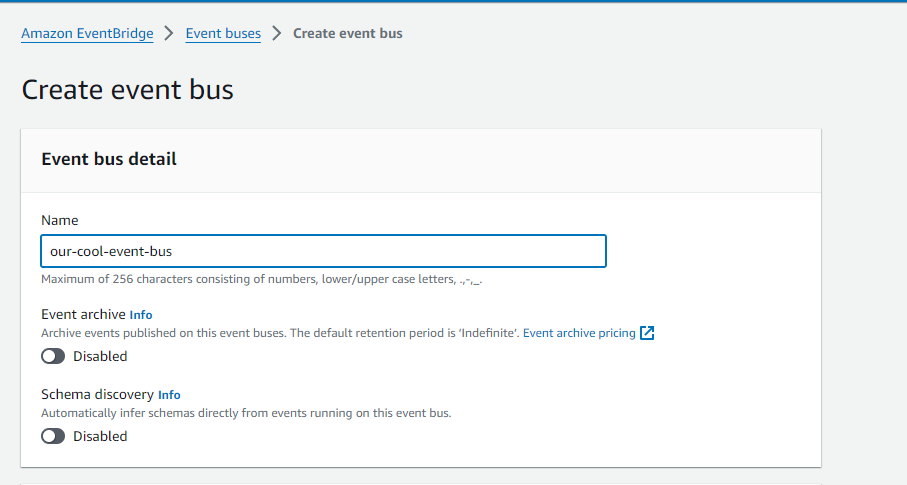
Then we are ready to create a custom event bus via the AWS management console.
Next we create a rule with the name ‘send-event-rule’ which will be triggered if an Event has the source ‘myEventBridgeSource’
aws events put-rule --name send-event-rule --event-pattern "{\"source\":[\"myEventBridgeSource\"]}"After this is finished we need to add some additional stuff.
To allow our sender-rust-lambda to put events to the event bus it needs the permission to do it.
For that go to the lambda sender-rust-lambda and click on the configuration tab.
Left click on ‘Permissions’
 Under Role Name it displays the role which when you click brings you to IAM
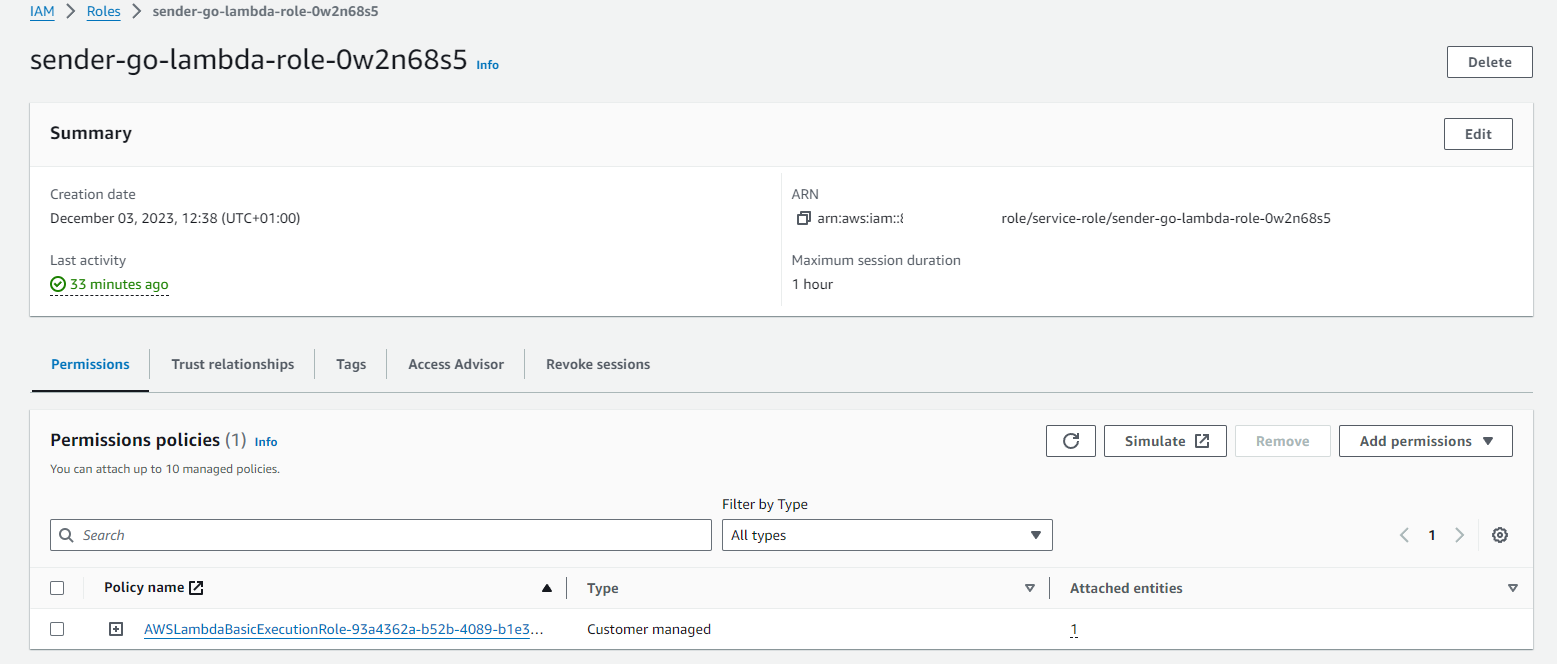
Under Permission Policies you click on Add permissions > Add inline policy
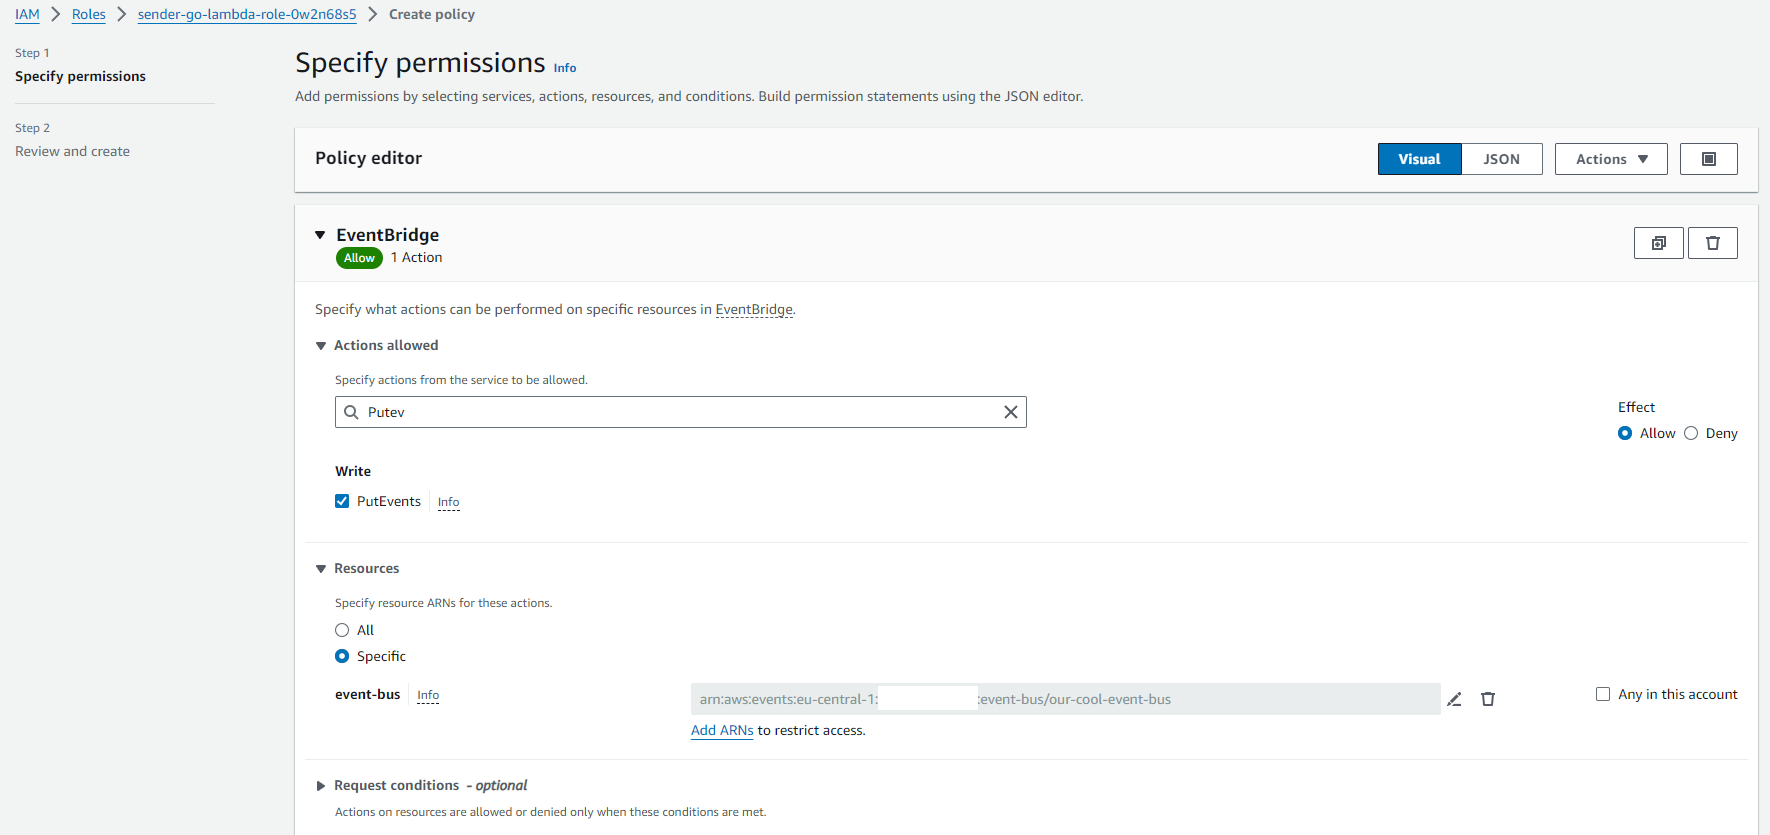
Here you filter for service EventBridge, Actions PutEvents (which you check) and under resources add the ARN of your previously created eventbus
Now is the time where we can create our Receiver lambda which will be triggered by the event bus on incoming events. This Lambda will print out all the information of our event.
Now you have to create your lambda in the AWS management console or via CLI
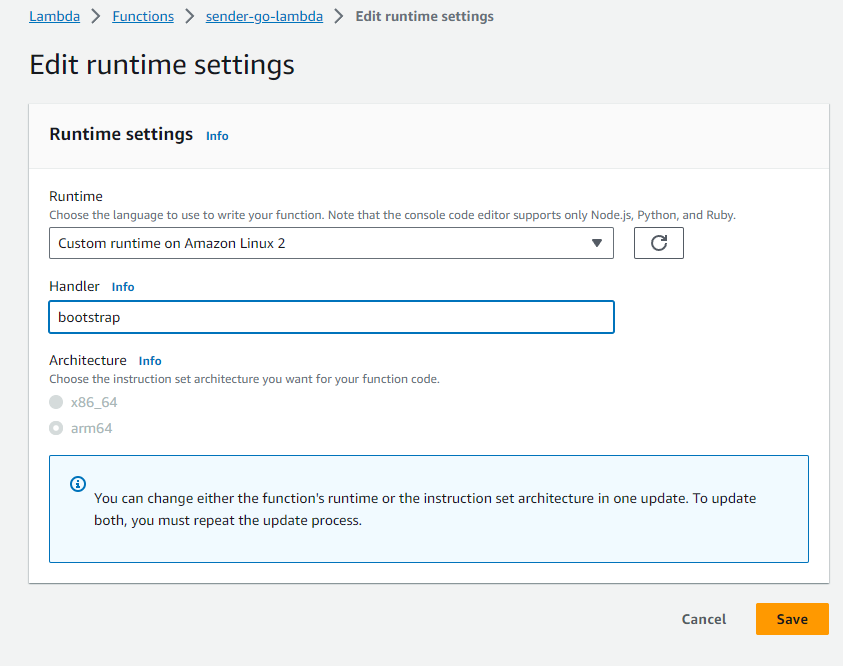
The lambda function has to be configured that it takes the correct entrypoint.
This can be done on the Lambda Management in the Code tab when you scroll down to Runtime Settings and click on Edit
Here you have to add bootstrap (the name of our binary) as Handler and then edit a second time and choose x86 as architecture.
cargo new receiver-rust-lambda

cd receiver-rust-lambda
Put in main.rs file.
use lambda_runtime::{service_fn, LambdaEvent, Error};
use serde_json::{json, Value};


async fn handler(event: LambdaEvent<Value>) -> Result<Value,Error> {
    println!("Incoming Event");
    println!("Version: {}", event.payload["version"]);
    println!("ID: {}", event.payload["id"]);
    println!("Detail: {}", event.payload["detail"]);
    println!("DetailType: {}", event.payload["detail-type"]);
    println!("Source: {}", event.payload["source"]);
    println!("AccountID: {}", event.payload["account"]);
    println!("Time: {}", event.payload["time"]);
    println!("Region: {}", event.payload["region"]);
    Ok(json!({ "message": format!("Hello!") }))
}

#[::tokio::main]
async fn main() -> Result<(), Error> {
    let func = service_fn(handler);
    lambda_runtime::run(func).await
}
Additionally we have to declare our dependencies in our cargo.toml file
[package]
name = "receiver-rust-lambda"
version = "0.1.0"
edition = "2021"

# See more keys and their definitions at https://doc.rust-lang.org/cargo/reference/manifest.html

[dependencies]
aws-config = { version= "1.0.3", features = ["behavior-version-latest"] }
tokio = { version = "1", features = ["full"] }
aws-sdk-eventbridge = "1.4.0"
lambda_runtime = "0.8.3"
serde_json = "1.0"
tracing = "0.1.37"
For compiling and updating the lambda function do the following:
cargo install cross --git https://github.com/cross-rs/cross

cross build --target x86_64-unknown-linux-gnu --release
You will find like above target\x86_64-unknown-linux-gnu\release folder in which you find the binary with the name receiver-rust-lambda. Rename this file to bootstrap and then zip it to bootstrap.zip.
Next we have to upload our zip file to our lambda function. You can do this either with the AWS cli or go to the AWS managment console and click on the Code Tab in the Lambda. On the right side you can upload the zip.
Next in your command line go to the folder which contains the bootstrap.zip
aws lambda update-function-code --function-name receiver-rust-lambda --zip-file fileb://./bootstrap.zipThe lambda function has to be configured that it takes the correct entrypoint. This can be done on the Lambda Management in the Code tab when you scroll down to Runtime Settings and click on Edit Here you have to add bootstrap (the name of our binary) as Handler and then edit a second time and choose x86_64 as architecture.
Now we can create a target which we apply to our previous created rule. You have to change the Arn to the function ARN you created before for the receiver lambda.
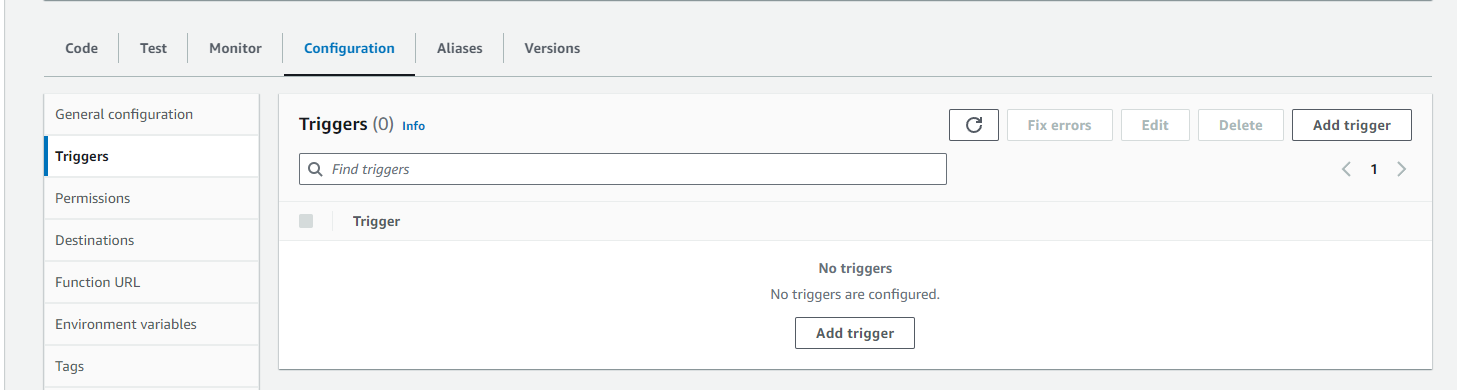
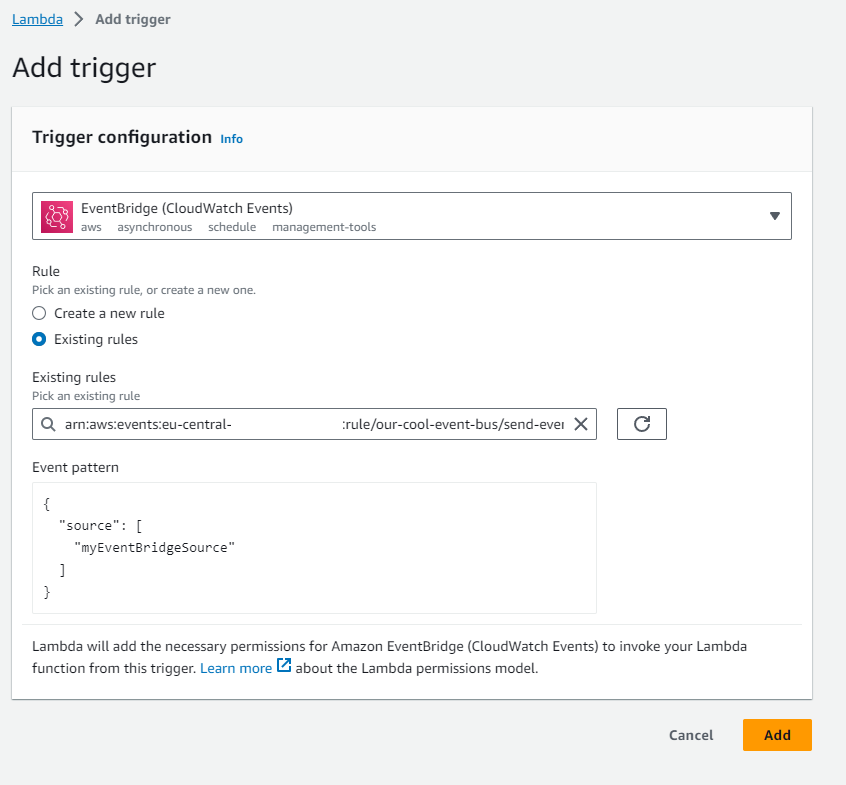
aws events put-targets --rule send-event-rule --targets "Id"="1","Arn"="PUT_HERE_RECEIVER_LAMBDA_FUNCTION_ARN"We also have to add an trigger in the Lambda console under configuration/triggers so that the lambda will be triggered by the EventBus.
 In the field Existing rules as we have a custom event bus the rule will not show up, so you have
to copy the ARN directly from the rule which you can open in the EventBridge Managment console under rules when you select our custom event bus.
In the field Existing rules as we have a custom event bus the rule will not show up, so you have
to copy the ARN directly from the rule which you can open in the EventBridge Managment console under rules when you select our custom event bus.
Now we are ready for testing. To do this select the sender-rust-lambda in the Managment Console click on the Test Tab and without adjusting any other parameters click on the orange Test Button on the right. If everything works well you can now go to CloudWatch and click the LogGroup for our receiver-rust-lambda. There you should see now log entries which print out all the information of the incoming event. If it doesnt work you have to go and test every part of our application. Test the sender-rust-lambda. If green go to the EventBridge and Click on Send Events. Add the necessary information especially the Event source which we defined above for our rule and click on Send. If you still doesnt see entries in the cloudwatch log of the receiver lambda test the receiver lambda itself via the Lambda Test Tab. Check for errors with permissions or if you get errors regarding runtime invocation look if you did the compiling correctly, the output file is called bootstrap and the runtime is configured correctly with bootstrap as Request Handler and x86_64 as architecture. I also had big problems to get the crosscompiling from windows running. With cross-rs everything worked out of the box, but you have to be sure that you take Amazon Linux 2023 as configured runtime in the lambda.